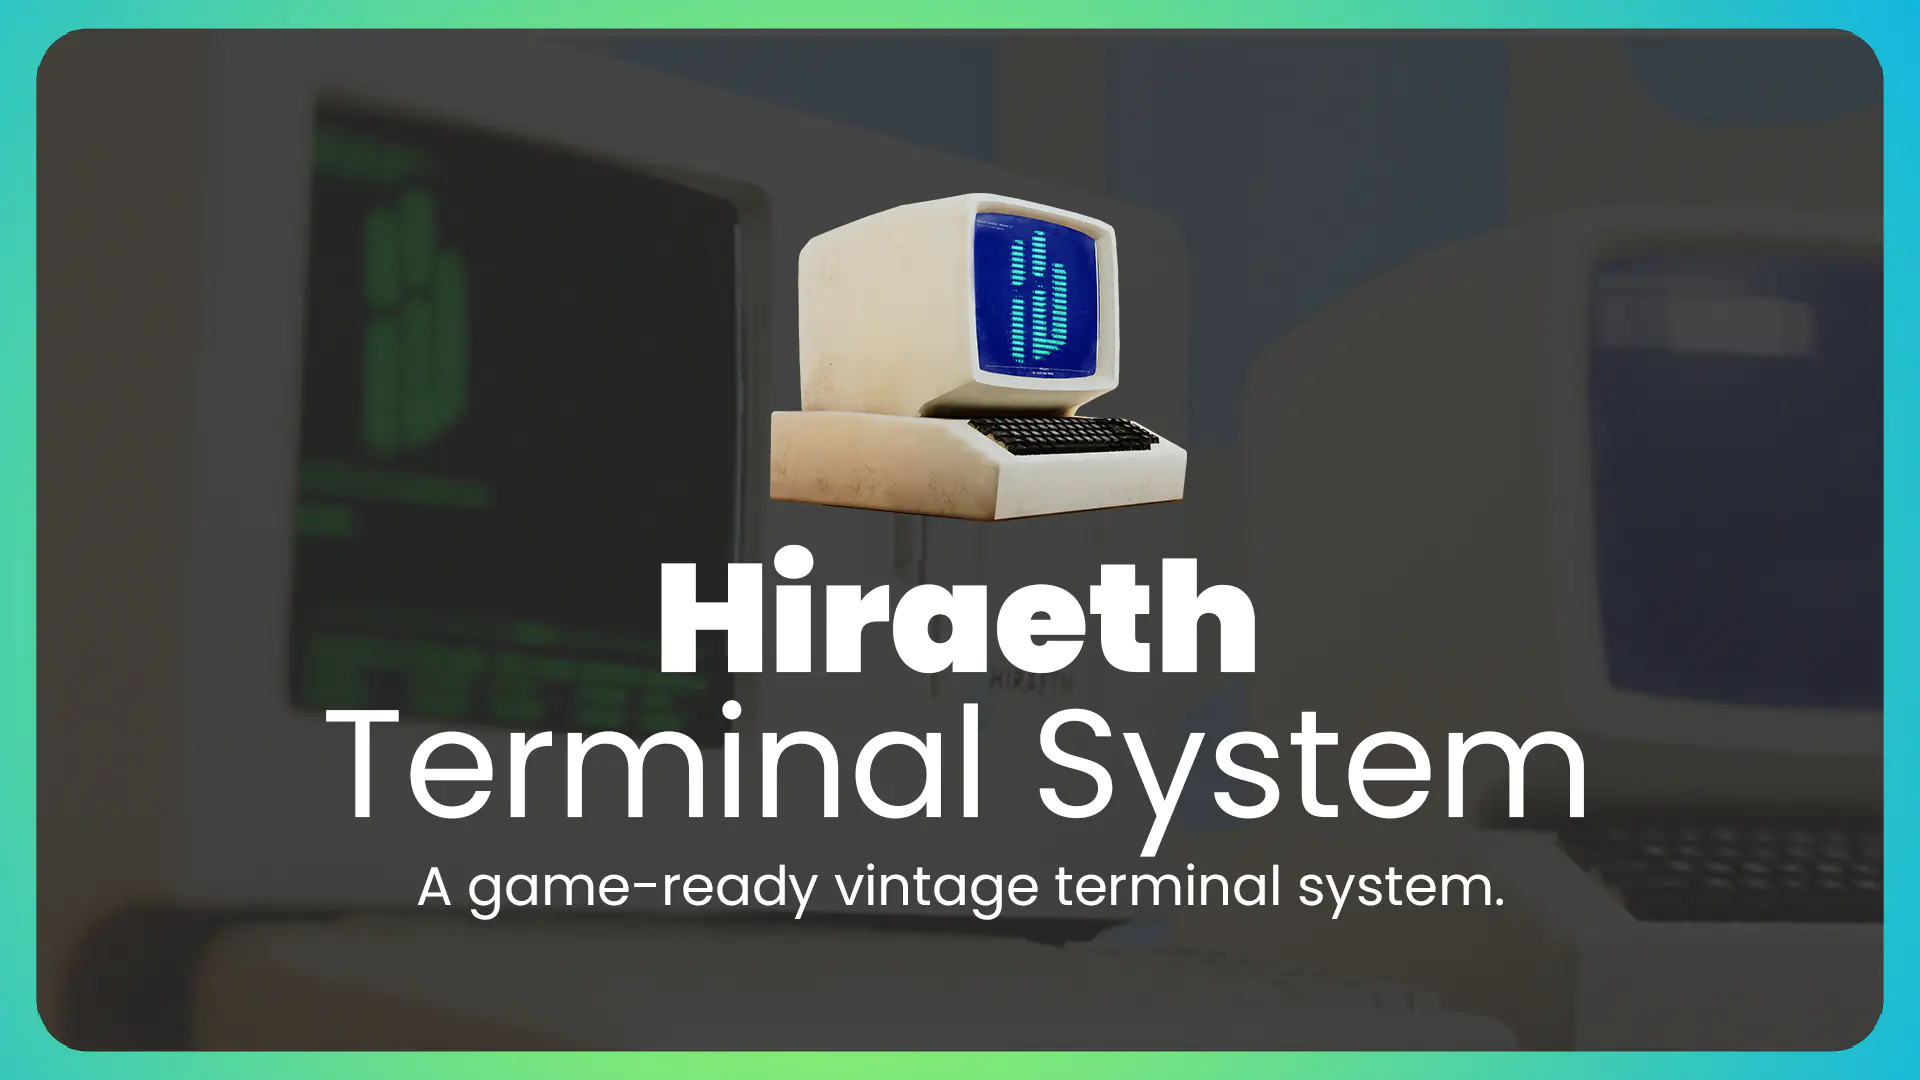
Overview
Last Updated: 1 year ago
Hiraeth Terminal System documentation
Getting Started › Introduction
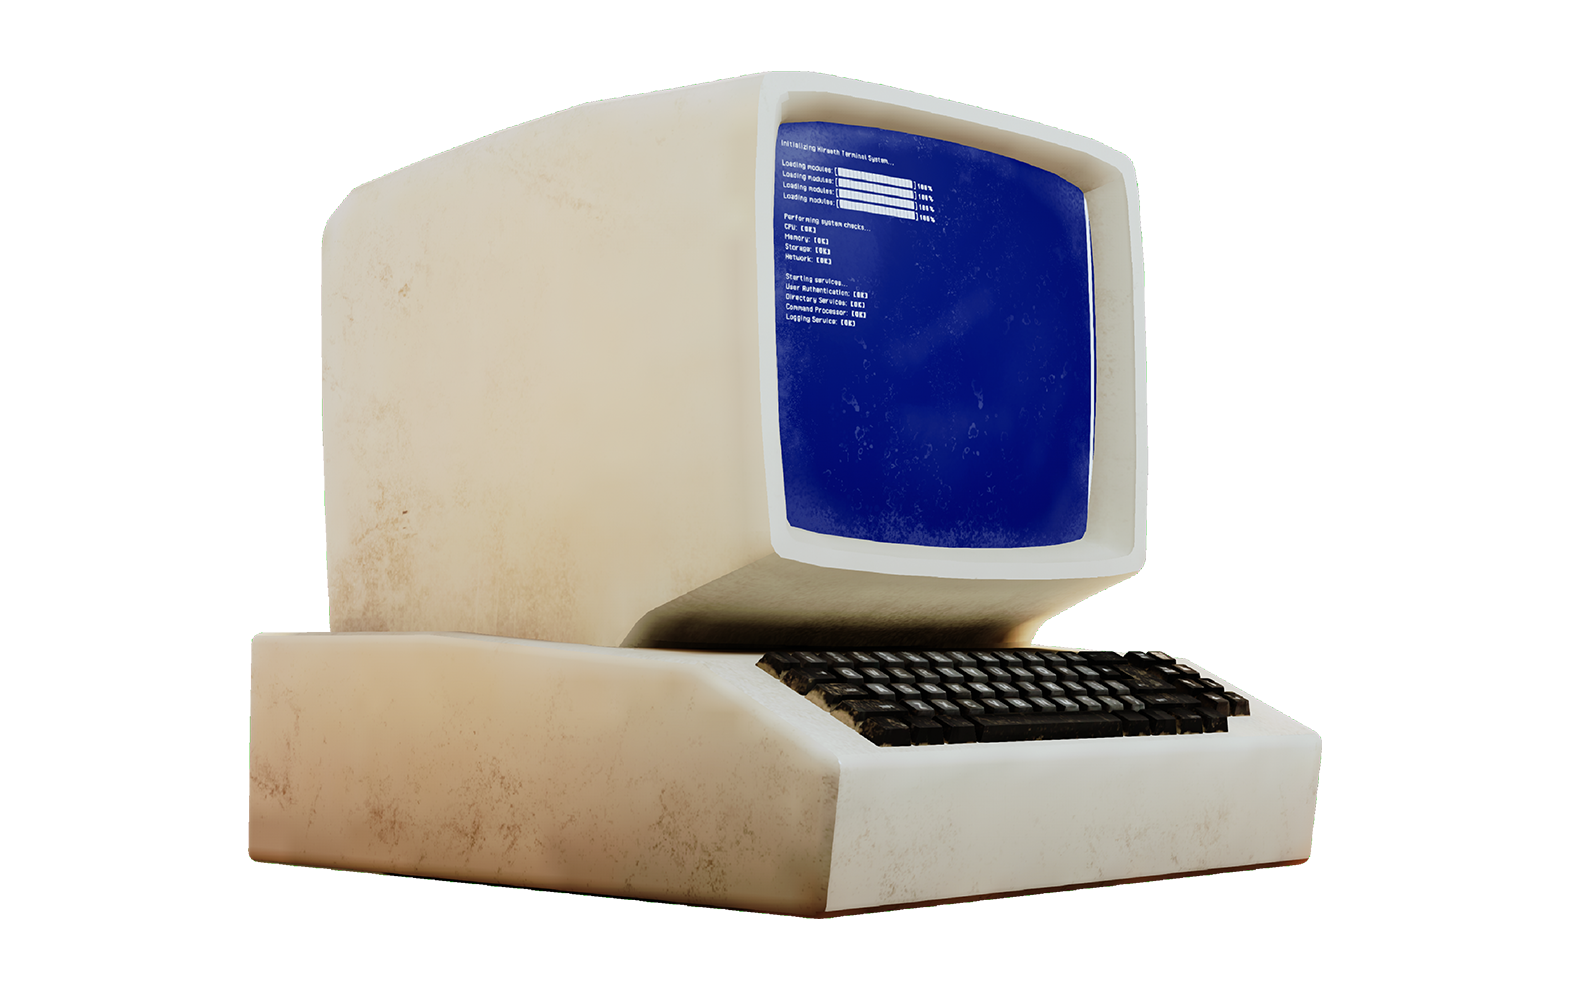
The Hiraeth Terminal System is a comprehensive command-line interface toolkit for Unreal Engine, designed to enhance gameplay with interactive terminal operations.
A versatile system that can be integrated as both an in-world actor and a UMG widget. Balancing functionality and realism, it provides developers with the flexibility to create immersive and responsive environments.
Usage › As a UI Widget
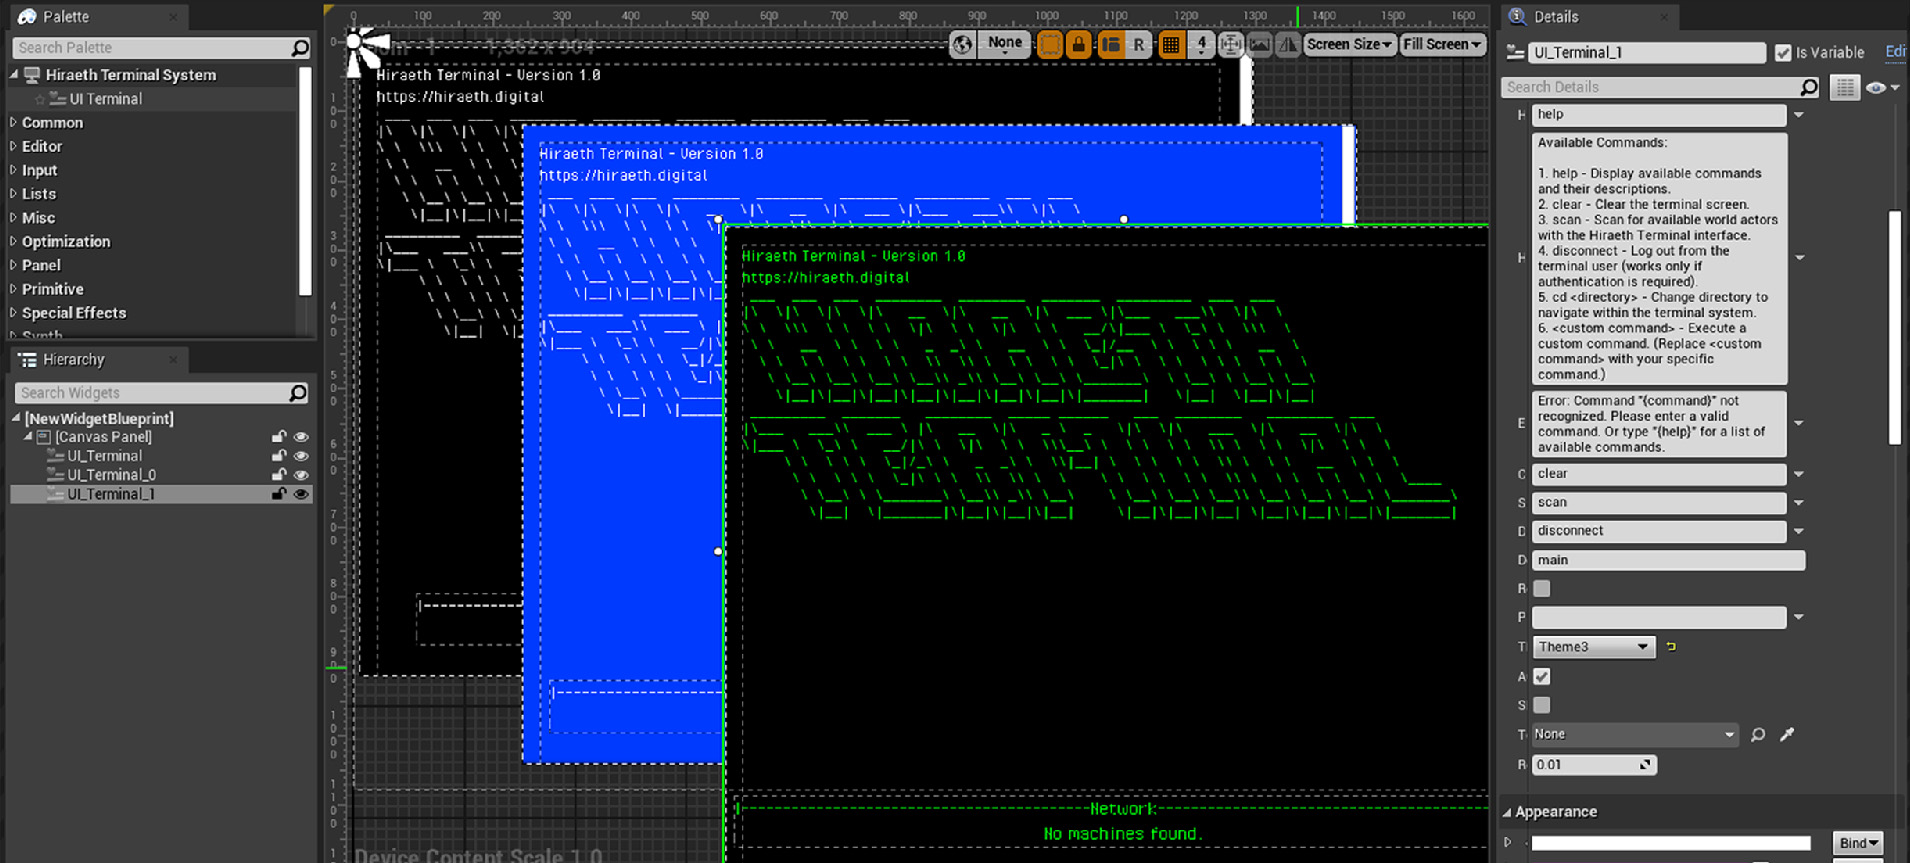
To use the Hiraeth Terminal System as a widget, you have two options:
1- Create the UI_Terminal Widget:
- Use the "Create Widget" function to create an instance of the UI_Terminal widget.
- Add the widget to the player viewport to make it visible.
Copy the following graph to get started:
2- Drag and Drop from UMG Palette:
Drag the UI_Terminal widget from the UMG palette located under the Hiraeth Terminal System category onto your canvas.
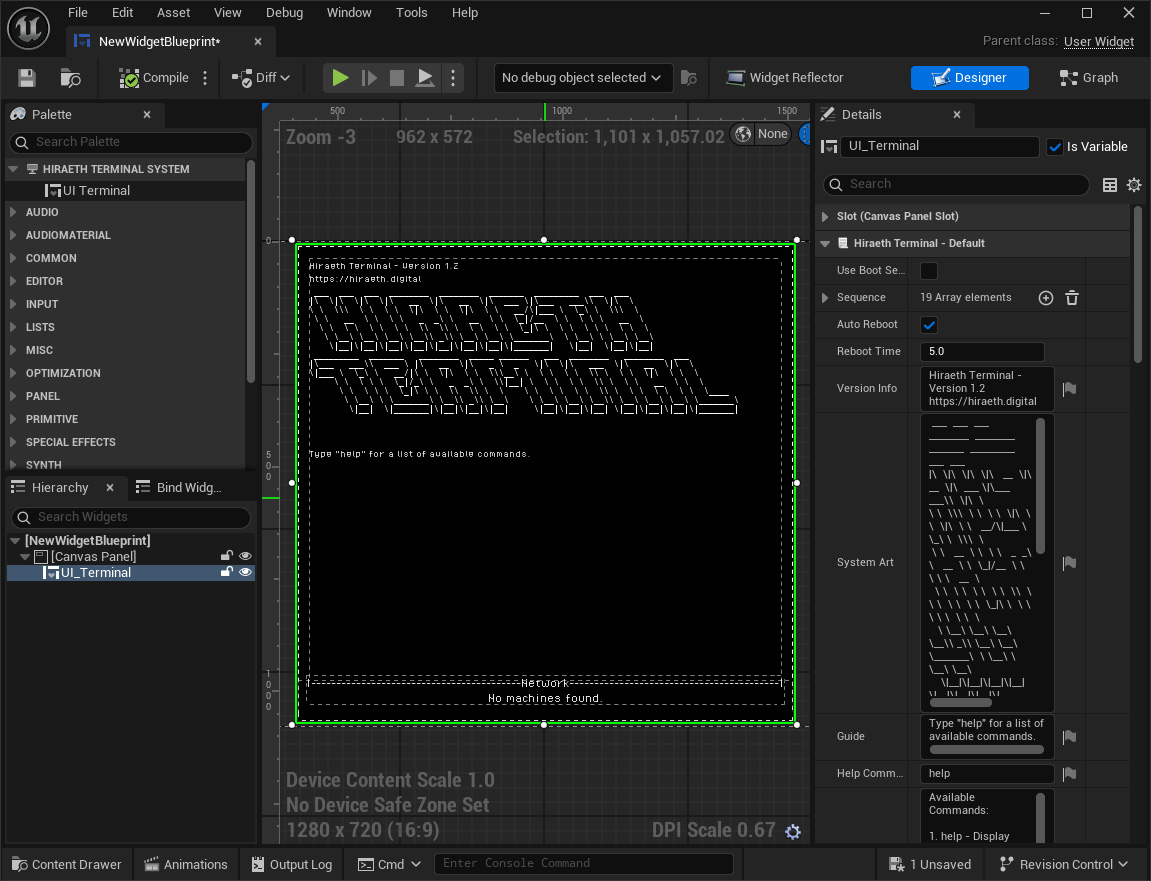
Customizing Default Variables:
After completing one of the above steps, you can customize the terminal's default variables, including:
- Default commands
- Help and error responses
- Password for authentication (if required)
- Default directory
- Theme
- Response delay between characters (in milliseconds)
- ...and more
You can use multiple terminals within the same widget. Each terminal can have its unique variables and directory.
Usage › UI Widget default options
| # | Name | Variable Type | Description |
|---|---|---|---|
| 1 | UseBootSequence | bool | If True, the terminal will run a boot sequence before initializing. |
| 2 | Sequence | struct | An array of boot sequence items. |
| 3 | AutoReboot | bool | If True, the terminal will reboot if a Boot Sequence item has a fail condition. |
| 4 | RebootTime | float | Time in seconds before the terminal reboots after failing. |
| 5 | VersionInfo | text | Version information text at the top of the terminal widget. |
| 6 | SystemArt | text | The terminal’s ASCII art. Uses the DroidSans font to ensure correct glyph display. |
| 7 | GuidePrompt | text | The (Type help for a list of commands) text. |
| 8 | HelpCommand | text | Default command to display help text. |
| 9 | HelpText | text | Text shown when executing the (help) command. |
| 10 | ErrorText | text | Message displayed upon entering an unknown command. |
| 11 | ClearCommand | text | Command to clear the terminal screen. |
| 12 | ScanCommand | text | Command to scan for available world actors with the Hiraeth Terminal Interface. |
| 13 | DisconnectCommand | text | Command to log out the terminal user, works only if RequireAuthentication was set to TRUE. |
| 14 | DefaultDirectory | text | Default directory of the terminal. |
| 15 | RequiresAuth | bool | Indicates whether password authentication is required for terminal access. |
| 16 | Password | text | Required password for authenticated access. |
| 17 | Theme | enum | Enumeration of default themes for the terminal interface. |
| 18 | AutoFocus | bool | Determines whether the terminal automatically focuses the keyboard on the command line. |
| 19 | ShowNetworkSection | bool | Indicates whether the network section appears at the bottom of the terminal screen. |
| 20 | TerminalBP | actor | Reference for the terminal blueprint actor, utilized in BP_MasterTerminal. |
| 21 | ResponseMaxDelay | float | Maximum delay in milliseconds between printing each character in the response. A random offset is added. |
| 22 | CommandDT | enum | A reference to the datatable containing available commands and their responses. |
Usage › As a BP Actor
To use the Hiraeth Terminal System as a World Actor, follow these steps:
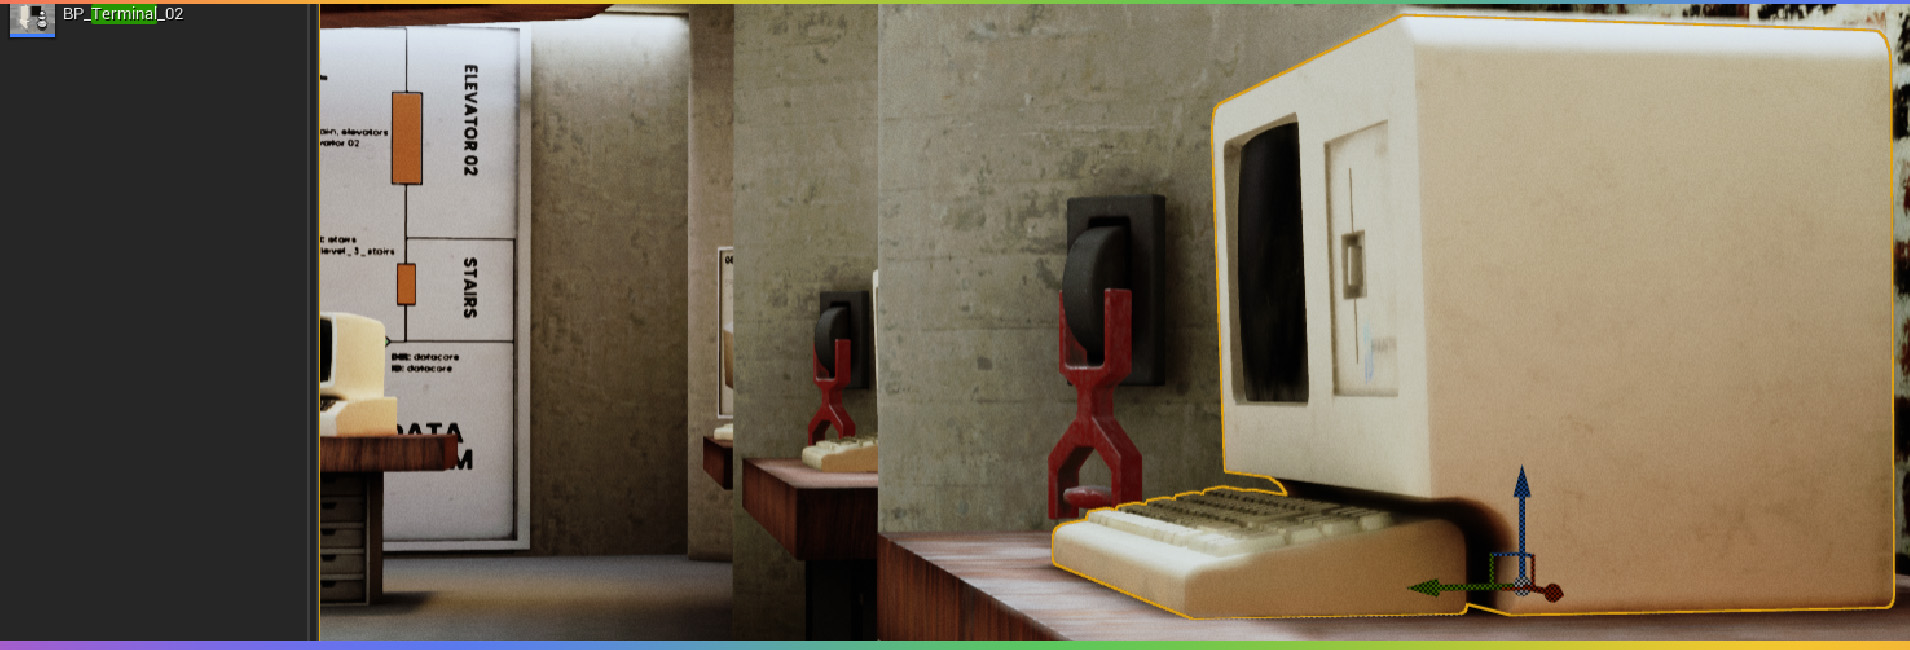
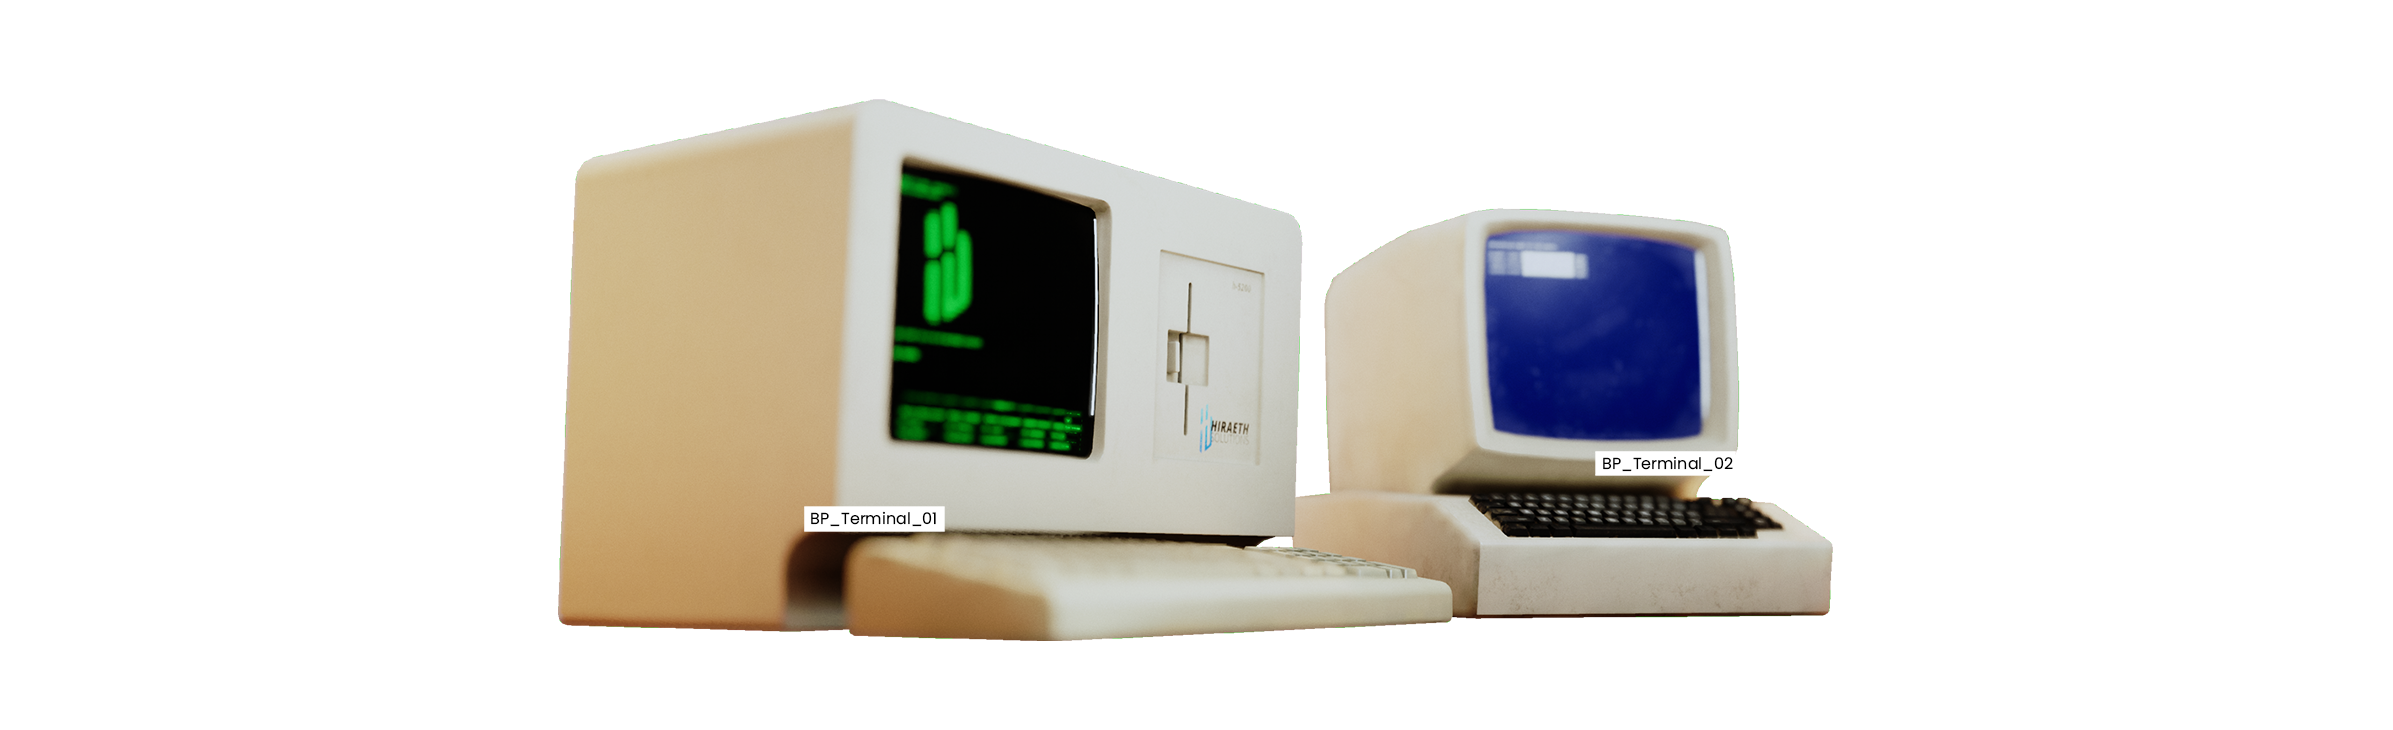
- Simply drag your custom instance or one of the example terminal actors provided with the system, such as BP_Terminal_01 or BP_Terminal_02 from the content browser into your world.
- Set the default variables of the terminal actor according to your preferences.
Interacting with the Terminal Actor
The simplest method to interact with terminal world actors is as follows:
- At your character's interaction event, obtain a reference to the hit actor.
- Check if the hit actor implements the Hiraeth Terminal Interface using the “Does Implement Interface” function, If TRUE, call the HT Interact interface event.
NOTE: The HT Interact event triggers only for Terminal world actors and the PowerSwitch actor, which manages terminal power states. Automatic Possession: When the Interact event is triggered at terminal world actors the system automatically handles unpossessing your original character and possessing the terminal pawn.
Input and Character Re-possession:
-Use the Left Mouse Button to focus on the terminal.-Use Middle Mouse Button to Zoom.
-Move mouse Axis to Rotate.
-Use the Right Mouse Button to leave the terminal and re-possess the original character.
IMPORTANT: Interacting with the terminal will unpossess your character (triggering the Event Unpossessed) and re-possess it on RMB (triggering the Event Possessed).
Ensure any custom logic tied to these events is accounted for in your implementation. Multiple Terminal Actors: It's possible to have as many terminal actors as needed. Each terminal actor can have its own unique ID and directory, enabling targeted interactions within the world environment.
Usage › BP Actor default options
In addition to the default variables found in the UI widget, the blueprint actor has the following extra variables:
| # | Name | Variable Type | Description |
|---|---|---|---|
| 1 | Machine Name | text | Name of the machine as it appears in the network section. |
| 2 | ID | string | ID of this specific terminal, used for targeted interactions. |
| 3 | PowerOn | bool | Determines whether the terminal starts ready and powered on. |
| 4 | ShowOnNetwork | bool | Indicates whether this terminal can be seen and accessed from other terminals. |
| 5 | ShowOnScan | bool | Show the actor in the scan result. |
| 6 | CanRotateCamera | bool | Enables or disables camera rotation using the mouse. |
| 7 | MaxRotation | float | Sets the maximum rotation in all directions. |
| 8 | RotationLagSpeed | float | The speed at which the camera rotates, Lower values result in slower movement. |
| 9 | AutoResetRotation | bool | If enabled, the camera will gradually return to its original position after movement. |
| 10 | CameraArmLength | float | Controls the camera spring arm length. |
| 11 | InitialFocalLength | float | The initial focal length of the camera, the focal length the camera will return to on zoom out. |
| 12 | AddToFocalLength | float | The focal length the camera will interpolate to when zooming, can be used to zoom in or out. |
| 13 | CaptureEveryFrame | bool | If true, the terminal widget will be captured every frame. |
| 14 | Wear | float | Controls the wear of the terminal body, screen, and keyboard. 0 represents clean, while 1 represents weary. |
Usage › Creating Actor Instances
It’s possible to create custom terminal instances using the BP_MasterTerminal blueprint.
This blueprint contains the terminal's Screen mesh, providing a foundation for adding custom terminal body and keyboard meshes.
Steps to Create A New Terminal Instance:
1- From the Content Browser, Go to:
- Content
- Hiraeth
- TerminalSystem
- System
- BP
- BP_MasterTerminal .uasset
Right click on the BP_MasterTerminal blueprint and select “Create Child Blueprint Class” to create a new terminal instance.
2- Add your custom terminal body and keyboard meshes to the new blueprint instance. Adjust the positioning and scaling of the screen to fit the terminal body.
3- Set the default variables specific to your terminal instance as needed.
Example Terminal Instances
The system includes two example terminal instances with different bodies to demonstrate customization options.
Usage › Available Functions
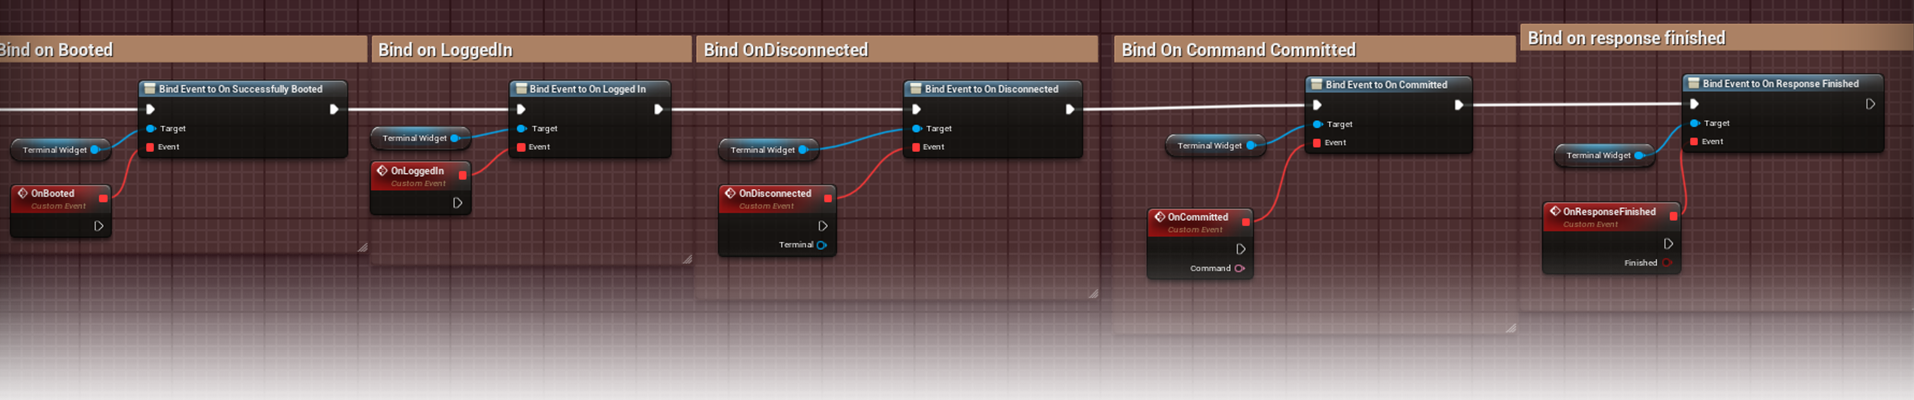
The BP_MasterTerminal has TurnOn and TurnOff functions. The UI_Terminal widget includes several event dispatchers which can be used to create custom gameplay interactions.
These event dispatchers are:
| # | Event | Description |
|---|---|---|
| 1 | OnCommandCommitted | Triggered when a command is entered and committed in the terminal. Can be used to execute additional actions based on specific commands. |
| 2 | OnDirectoryChanged | Triggered when the directory path changes within the terminal. Implement custom logic when navigating different directories. |
| 3 | OnDisconnected | Triggered when the terminal disconnects from its current session. Handle disconnection events to manage terminal states or alert users. |
| 4 | OnFailedBoot | Triggered when the terminal fails to boot up correctly. Use this to provide feedback or initiate recovery procedures. |
| 5 | OnSuccessfullyBooted | Triggered when the terminal successfully completes the boot sequence. Implement post-boot configurations here. |
| 6 | OnLoggedIn | Triggered when a user successfully logs into the terminal system. |
| 7 | OnResponseFinished | Triggered when the terminal finishes processing a command and generates a response. |
Adding new › Commands
You can easily add new commands and responses at the DT_Commands datatable found at:
- Content
- Hiraeth
- TerminalSystem
- System
- Data
- DT_Commands . default commands
- DT_Commands_01 . each terminal instance can have its own unique commands DT
2- Click Add to add a new row.
3- Set the Command and the Response fields.
-Utilize placeholders such as: {command} (replaced with the entered command)
{name} (represents the name of the actor being interacted with).
Example Response
For instance, a response to the "Activate" command could be:
“Command {command} completed, {name} has been activated.”
Overriding Default Responses
You can override default responses set in the datatable on a per-actor basis.
To do so, follow these steps:
-Set OverrideDefaultResponses variable to TRUE: The "OverrideDefaultResponses" variable is found at the "GetActorData" interface function.
-Use TerminalBP Reference at the OnCommandReceived Interface: After implementing the "OnCommandReceived" interface event, use its TerminalBP reference to call the OverrideDefaultResponse function.
-Override Function Variables:
The override response function includes:
Response: Overrides the default response, utilizes placeholders {command} and {name}.
ResponseMaxDelay: Overrides the default response maximum delay.
-Unique Commands Datatable: Each Terminal instance can have its own unique commands datatable containing a unique set of commands and responses. To create a new set of commands and responses simply duplicate the DT_Commands datatable, add your new commands, then replace the Commands DT reference found at the Terminal widget or Terminal BP.
Adding new › Directories
Directories:
Directories can be added to the Hiraeth Terminal System in two ways:
-Using BP_Directory Actor: Drag and drop the "BP_Directory" actor into the world. Set its default variables, identical to the Terminal BP actor variables. This method is particularly useful when utilizing the Terminal as a widget, eliminating the need for physical meshes.
-Using Terminal Actors: Add terminals to the world and assign a unique directory to each. Additionally, utilize the "BP_Directory" actor to add directories when using the Terminal in the world. This approach is beneficial in scenarios where a single terminal actor is available, but multiple directories must be accessed.
Files: Files can be integrated into the Hiraeth Terminal System using the following methods:
-Using BP_File Actor: Drag and drop the "BP_File" actor into the world. Set its default variables, including: -FileContent (text)-Name (text)-ID (string), -Directory (string).
This setup allows files to be downloaded using the "download " command.
-Use any Blueprint Actor as a File:
Transform any blueprint actor into a file by:
1- Implementing the Hiraeth Terminal Interface.
2- Setting the interface’s GetActorData function.
3- Implementing the OnCommandReceived interface event.
4- When the "download" command is received, override the default terminal response with your file's content.
Adding new › Themes
To expand the visual options within the Hiraeth Terminal System, follow these steps to add a new theme:
1 - Open DT_Themes Datatable: Open the DT_Themes datatable where themes are managed.
2- Add New Theme: Add a new row to the datatable to represent the new theme.
3- Update Enum_Themes Enumeration: Add the name of the new theme to the Enum_Themes enumeration. This step ensures the new theme is recognized and accessible within the system.
4- Set Text and Background Colors: Once the new theme is added, set the desired text and background colors for the theme.
There are three default themes available, each emulating color combinations commonly found in terminals.
Adding new › Interacting with world actors
Interacting with other world actors or characters through the Hiraeth Terminal System can be achieved by following these steps:
1- Implement Hiraeth Terminal Interface:
At the actor class intended for interaction, implement the Hiraeth Terminal Interface.
2- Set GetActorData Variables:
Within the implemented interface, set the GetActorData variables, including the crucial ID variable. This step ensures proper identification and interaction with the target actor.
3- Implement OnCommandReceived Event:
Implement the OnCommandReceived event within the actor class. This event is triggered when the terminal sends a command specifically intended for this actor.
4- Custom Logic and Responses:
Utilize the "SwitchOnString" node to create custom logic based on specific commands received by the actor.
Additionally, you can override default terminal responses using the Terminal BP reference, allowing for dynamic and tailored interactions based on gameplay requirements.
Other › BP Interface
The Hiraeth Terminal Blueprint Interface offers a set of essential functions for interaction within the Hiraeth Terminal System. Here's a breakdown of each function:
| # | Event | Description |
|---|---|---|
| 1 | OnCommandReceived | This function is invoked when an actor receives a command from the terminal. It facilitates dynamic interactions between the terminal and various actors within the game environment. |
| 2 | GetActorData | Used to retrieve data related to interactable actors, such as their name, ID, and directory. Enables the terminal to access essential information about target actors for precise interaction and gameplay functionality. |
| 3 | GetTerminalData | Provides access to data associated with terminal and directory actors. Allows retrieval of critical information about terminals and directory actors, enhancing system functionality and interaction capabilities. |
| 4 | Interact | Triggers interaction events specifically designed for Terminal and PowerSwitch actors. Facilitates interaction between the terminal and these specialized actors within the game world. |
| 5 | ToggleOutline | Used to toggle an outline around interactable objects within the game environment. |
Changelogs
- Replaced demo outline material.
- Updated documentation found at: Hiraeth/TerminalSystem/System/Docs/
- Reorganized and recommented BP_MasterTerminal blueprint graph.
- Added a customizable camera rotation function.
- Added InitialFocalLength variable.
- Added Camera Arm Length variable.
- Added FocusKeyboard event to BP_MasterTerminal to manually set keyboard focus on command input.
- Added a Zoom input event and added AddToFocalLength variable to control zoom level.
- Fixed CaptureEveryFrame when using Boot Sequence.
- Fixed outline bug in demo character.
- Added a UI only terminal example to the demo level
- Made it possible for each terminal instance to have its own Commands datatable.
- Added customizable boot sequence.
- Added CaptureEveryFrame option to BP_MasterTerminal.
- Added UI_ScanItem to organize scan results.
- Changed blueprint setup to include BP_MasterTerminal
- Added extra terminal example mesh and BP instance of BP_MasterTerminal
- Added VersionInfo, AsciiArt and HelpPrompt variables to terminal UI.
- Bug fixes
- Bug fixes
- initial release